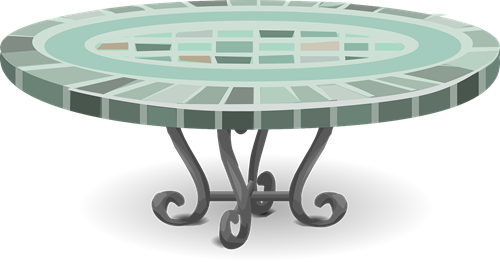
Give new life to outdoor tabletops using concrete or tile - and liven up one of the most important parts of your home, your porch or patio. It is surprisingly easy to make over an existing table; in some cases, the base of a table remains in excellent shape, while the horizontal surface ages more swiftly. A tile or concrete finish allows you to use what you already have and to make a custom piece you'll enjoy for years to come. While every project is different, the details below will help you get started with a concrete or tile makeover.
Tile and concrete will have the same basic costs and take the same amount of time to complete. The differences lie in the look of the final results; you may prefer the look of a single, impressive slab or an artistic, tile mosaic, or another version that may better fit your home. The final consideration is tools and experience. If you've already laid tile in a bathroom or kitchen, or have a tile saw and tools, then tile may be the right fit for your makeover. If you've made concrete stepping stones and other pieces for the yard, then you might be more comfortable with this material instead.
Make sure your tabletop is in decent shape and that there are not any large gaps or large areas of damage. Measure your tabletop and sketch out a design. You can create an artistic rendering, a geometric pattern or simply place the tile in a line. Planning things out first ensures you know how much to buy and what to cut. For tables, the pre-cut pieces designed for borders and trim often work well, so a trip to the DIY store can help you determine more about your needs and preferences.
You'll need a tile adhesive rated for outdoor use to secure the tiles. Layout the tiles on the table before securing to check the fit and look of your chosen design. When you are happy, glue the pieces into place with the adhesive. Work in small areas and allow the glue to set for at least 24 hours (cover the table with plastic if needed).
Fill in the gaps between tiles with mortar rated for outdoor use, and allow to dry at least 48 hours before using the table.
Concrete's smooth surface comes from being poured, so you'll need to prepare the table before you mix anything. Your table should be clean, dry and clear of any defects, though the concrete will fill in small holes and hide minor blemishes.
Create an edge around the table using a product made for concrete. This temporary barrier will be removed at a later date, but will keep the concrete in place as it dries. You can find flexible edging designed for this purpose at a DIY store.
Mix the concrete as indicated on the package, then pour or scoop onto the table, smoothing it out with a trowel as you go. Once the concrete begins to set, you can make any impressions or patterns you like, or simply let it dry and harden. Do not remove the edges until the concrete is fully dried.
48 hours later, remove the edging and sand or touch up the table, then enjoy.
Concrete or tile? The choice is yours -- either of these finishes will add years to the life of your table and ensure you create a piece that is uniquely yours. Allow yourself a weekend to tackle this project and wait for a sunny, comfortable day, as most parts need to be completed in place outdoors.

Anthony Susi - "The King of Real Estate”
For more than 27 years, Anthony Susi has been helping people buy and sell their homes in both appreciating and declining markets. As a seller, Anthony will assist you in differentiating your home from other homes in the same market and as a buyer, he will help you to become an educated Buyer, and show you the advantages of having an experienced agent on your side of the table!
"Committed to Excellence, Honesty, and a High Standard of Service."